
 中文简体
 русский
 Français
 Español
 Português
 Deutsch
 عربى
 italiano
 Türk

Search
Categories
Recommend News
Categories
Recommend News
-
Industry News
-
Industry News
-
Industry News
-
Industry News
Nov 03, 2026 - By admin
Air Fryer Barbeque Chicken Thighs: Cook Times, Temps, and Sauce Timing
Six bone-in thighs, a jar of sauce and a rainy afternoon that rules out the grill: that is the usual starting point for air fryer barbeque chicken thighs. The basket handles this cut well, and on a weeknight it is often faster and more forgiving than charcoal, because the meat stays moist in the circulating heat while the skin crisps up if you get the order of operations right.
Here is the short answer before the detail. Set the appliance to 400°F (200°C) and preheat for four minutes. Pat the thighs dry, season them, and lay them skin-side down in a single layer. Cook 10 to 12 minutes, flip, and continue until the thickest part reads 155°F to 160°F on an instant-read thermometer. Brush on the sauce, then give it another 4 to 6 minutes until the glaze tightens and the internal temperature passes 165°F (74°C). Rest five minutes before serving.
That sequence is the backbone of everything below. Boneless, skinless thighs compress the timeline to roughly 12 to 16 minutes total. Frozen bone-in thighs stretch to 35 minutes or more and need a lower starting temperature so the outside does not darken before the center thaws. Once you understand why those numbers move, you can cook the same recipe in a 2-quart starter unit or a 6-quart family basket without guessing.
The rest of this guide covers the mechanics, the failures worth avoiding, and the appliance details that decide whether a batch comes out with lacquered skin or a puddle of sauce at the bottom. It is written for home cooks and, further down, for buyers and product teams evaluating air fryers as a category.
Air Fryer Barbeque Chicken Thighs: The Short Answer
Most disappointing batches fail on one of three points: wet skin, cramped airflow, or sauce applied too early. None of them are about the recipe itself. Fix those three and the timing becomes a matter of confirming temperature rather than chasing a clock.
Work from a dry surface. Moisture on the skin has to evaporate before browning begins, and in a small basket that evaporation happens at the cost of cooking time. Paper towels are enough, but leaving the thighs uncovered in the refrigerator for 30 minutes does more for crispness than any rub ingredient will.
Use the table below as a starting point rather than a rule. Every appliance runs slightly hot or slightly cool, and a thermometer is the only reliable way to know which one you own.
| Cut | Approximate time at 400°F | Target internal temperature | Main risk |
|---|---|---|---|
| Boneless, skinless thigh (4 to 6 oz) | 12 to 16 minutes | 165°F (74°C); 175°F for softer texture | Drying out if left past 180°F |
| Boneless, skin-on thigh | 16 to 20 minutes | 165°F to 175°F | Skin sticking to the basket |
| Bone-in, skin-on thigh (6 to 8 oz) | 22 to 28 minutes | 170°F to 180°F | Undercooked meat next to the bone |
| Large bone-in thigh (10 oz and up) | 28 to 34 minutes | 175°F to 185°F | Skin burning before the center is done |
| Bone-in thigh cooked from frozen | 35 to 45 minutes at 350°F, then 400°F to finish | 175°F to 185°F | Uneven thaw leading to a cold bone |
Two practical notes sit behind those numbers. First, dark meat is more forgiving than breast meat, which is why the target range tops out above 165°F: connective tissue in the thigh softens further between 170°F and 185°F, and the meat turns silky rather than stringy. Second, the sauce goes on late. Barbecue sauce carries sugar, sugar scorches quickly at 400°F, and a thigh coated at the start will taste bitter long before it tastes smoky.
Treat 400°F for the first stretch and 165°F internal as the two fixed points; everything else, including sauce and resting, is adjustable.
Why Thighs Need Their Own Rules
Chicken thighs contain noticeably more fat and connective tissue than breasts, and that changes both the timing and the tolerance for error. Fat renders slowly and bastes the meat from the inside, so a thigh can survive a few extra minutes in the basket that would ruin a breast. Collagen, the protein that makes raw thighs feel tough, breaks down into gelatin somewhere between 160°F and 180°F, which is why the second half of the cook matters as much as the first.
The skin is a separate problem. It browns through two mechanisms: moisture evaporating from the surface, and the Maillard reaction between proteins and sugars once the surface is dry and hot. Circulating air accelerates both, but only if the surface is exposed. A thigh pressed flat against another thigh steams instead of roasting, and steamed skin turns rubbery the moment it cools.
There is also a physics reason to keep the sauce until the end. Barbecue sauce typically contains 8 to 15 grams of sugar per two tablespoons. Sugar begins to caramelize around 320°F to 340°F at the surface, and the air in a 400°F basket is well above that. A thin coat applied in the final five minutes warms, thickens and glazes. The same coat applied at the start carbonizes into a dark, acrid shell that no amount of basting will fix.
Finally, consider carryover. A thigh removed at 163°F continues climbing as the exterior heat migrates inward, often reaching 168°F to 170°F after five minutes of rest. Pulling at 175°F and resting means the meat finishes closer to 182°F, which is still pleasant for dark meat but leaves less margin if you plan to reheat leftovers the next day.
Dry skin, uncrowded pieces and late sauce control the result more than any single spice in the rub.
Choose the Cut Before You Choose a Temperature
Bone-in and boneless thighs are not interchangeable, even though supermarkets shelve them side by side. Bone conducts heat into the center slowly and shields the meat directly beneath it, so a bone-in thigh needs a longer, gentler start. Boneless thighs are thinner, cook fast, and dry out quickly if you walk away.
For a first attempt, bone-in and skin-on gives the most margin. The skin protects the meat, the bone slows the center so the outside has time to render, and the shape holds up to flipping. Boneless, skinless thighs suit people who want the meat for wraps, rice bowls or meal prep, where a crisp skin is irrelevant and speed matters more.
| Cut | Best for | Time to 165°F | Watch out for |
|---|---|---|---|
| Bone-in, skin-on | Weekend plates, serving whole, glazed presentation | 22 to 28 minutes | Underdone meat near the bone |
| Boneless, skinless | Meal prep, salads, sandwiches, fast dinners | 12 to 16 minutes | Overshooting into dryness |
| Boneless, skin-on | Crisp skin with faster cooking | 16 to 20 minutes | Skin curling away from the meat |
| Thighs with excess fat and flaps | Any | Add 2 to 3 minutes | Smoke from rendered fat pooling |
Trim obvious fat flaps before cooking, but leave the skin intact. Flaps burn at the edges and release smoke that fogs the basket window, and in smaller appliances a tablespoon of pooled fat on the bottom plate is enough to set off a kitchen alarm. If your model has a removable drip tray, line it with a little foil for cleanup, never the basket itself.
Bone-in, skin-on is the safer choice for beginners because the bone and skin both buy you time before the meat dries.
The Five-Step Method That Works Every Time
The sequence below is deliberately rigid about order and flexible about seasoning. Follow it once, note your appliance's actual behaviour, and adjust from there.
- Preheat the basket empty at 400°F (200°C) for 3 to 5 minutes. A cold start extends the total time and produces paler skin, because the heating element spends its first minutes warming the cavity instead of the food.
- Dry and season. Pat the thighs thoroughly with paper towels, then rub with oil and apply a dry rub. Salt should be part of that rub, roughly 3/4 to 1 teaspoon of fine salt per pound of meat, or 1 to 1.25 percent of the meat's weight if you weigh it.
- Load skin-side down in a single layer with 1/4 to 1/2 inch between pieces. Skin-side down first protects the surface from the direct top element and lets the fat render into the basket, which is what makes the skin crisp when you flip it.
- Cook 10 to 12 minutes, flip, and continue until the thickest part away from the bone reads 155°F to 160°F. For boneless thighs, start checking at 8 minutes; the window between juicy and dry is narrow.
- Glaze and finish. Brush generously with sauce, cook 4 to 6 minutes more until the glaze bubbles and the internal temperature passes 165°F, then rest 5 minutes on a warm plate before serving.
Two refinements help on repeat cooks. If the skin is browning faster than the center is cooking, drop the temperature to 375°F and add 4 minutes; the gentler air is kinder to the surface. If the basket has a crisper plate or a rack, use it, because elevating the food lets fat drain away and hot air reach the underside.
Do not skip the rest. Slicing a thigh straight from the basket releases juices onto the board instead of back into the meat, and the difference between a rested and unrested thigh is visible on the plate within seconds.
Skin-side down first, sauce last, and a five-minute rest are the three steps that separate a good batch from an average one.
Cooking Times at a Glance
The chart below compresses the table above into a single comparison, using the midpoint of each range so the differences are easy to see at a glance. It assumes a preheated basket, a single layer and a unit in the 1,500 to 1,800 watt range, which covers most household models sold through retail and online channels.
Approximate minutes to reach 165°F at 400°F (200°C)
Boneless, skinless, small (4 oz)
Boneless, skinless, large (6 oz)
Bone-in, skin-on, small (6 to 8 oz)
Bone-in, skin-on, large (10 oz and up)
Bone-in, cooked from frozen
The spread between the shortest and longest bar is more than twenty-five minutes, which explains why a single "cook for 20 minutes" instruction fails so often across different kitchens. Wattage accounts for part of that variation. A 1,500 watt appliance recovers heat more slowly after the basket is opened than an 1,800 watt unit, so every flip and every brush of sauce costs a little time.
Basket volume matters just as much. A 6-quart basket holding six thighs leaves enough room for air to move between pieces, while a 3-quart basket holding the same load forces contact and traps steam. For manufacturers and suppliers, that relationship between rated capacity and usable capacity is one of the most common points of confusion in product listings, and it is worth stating in plain terms on the box.
Recovery time also depends on how much cold mass enters the cavity at once. Adding six refrigerator-cold thighs to a preheated basket can drop the air temperature by 40°F or more, and the element then spends several minutes climbing back. Smaller batches, spaced out, hold temperature better and produce more even browning even if the total cooking time rises slightly.
Match the batch to the basket and the timing takes care of itself; an overloaded basket will run late no matter what the dial says.
Sauce Timing and the Sugar Burn Problem
Barbecue sauce is not a marinade. It is a finish, and treating it as a finish solves nearly every complaint about burnt or bitter glaze. The technique is simple: cook the thighs bare until they are nearly done, then brush, then give the sauce a short window of high heat to tighten.
Work in two coats if you want a thicker glaze. Brush the first coat at 155°F internal, cook three minutes, then brush a second coat and cook another two to three minutes. Warm the sauce slightly before brushing so it spreads thinly instead of sitting in a cold clump that insulates the skin underneath.
Sweetness levels matter. A molasses-heavy sauce with 12 grams of sugar per serving will darken faster than a vinegar-forward Carolina-style sauce, so if you prefer a sticky glaze, drop the temperature to 375°F for the glazing stage and add two minutes. Honey-based sauces are the most sensitive of all and are better brushed on after the basket is switched off, letting residual heat set the glaze during the rest.
If you want sauce on the side as well, reserve a portion before glazing. Sauce that has touched raw or partly cooked chicken should not go back on the serving plate, and a separate bowl costs nothing.
Apply sauce only in the final five minutes; before that, sugar burns faster than the meat cooks.
Seasoning, Salt and Marinade
Salt is the only non-negotiable ingredient. A dry rub built on 1 tablespoon of brown sugar, 1 tablespoon of paprika, 1 teaspoon of garlic powder, 1 teaspoon of black pepper, 1/2 teaspoon of cayenne and 2 teaspoons of fine salt will season about two pounds of thighs properly. Increase the salt rather than the sugar if the meat tastes flat.
Dry brining is the highest-return step available. Salt the thighs and leave them uncovered in the refrigerator for 30 minutes to 4 hours. The salt draws moisture out, dissolves, and is reabsorbed as a concentrated brine, seasoning the meat through rather than just the surface. The uncovered air simultaneously dries the skin, which is exactly what you want before a 400°F basket.
Acidic marinades need a limit. Yogurt, buttermilk and citrus tenderize quickly, but past four hours the surface proteins break down and the texture turns mealy. A yogurt marinade with cumin, paprika and garlic at two to four hours gives a tangy, tender result; overnight is too long for a thin boneless thigh.
A small amount of baking powder in the rub, about 1/4 teaspoon per pound, raises the skin's pH and speeds browning. Use it sparingly and mix it thoroughly into the rub, because an uneven dusting leaves a faint metallic taste in patches.
Salt early and dry the skin; the rub's flavor matters far less than those two decisions.
Airflow, Batch Size and Basket Loading
An air fryer is a small convection oven, and convection depends on space. Every piece you add removes volume that hot air could otherwise move through. The practical limit for a 6-quart basket is roughly 1.5 to 2 pounds of bone-in thighs, which is six to eight pieces in a single layer.
Lay them skin-side down and keep a finger's width between them. Overlap creates cold spots and pale skin, and stacking guarantees that the pieces at the bottom steam while the ones on top scorch. If you need more than one batch, cook in two rounds rather than crowding one; the second batch takes less time than the first because the basket is already hot.
Accessories change the airflow. Perforated parchment helps cleanup but blocks 10 to 15 percent of the holes if it is not cut to size, and a solid liner turns the basket into a frying pan. A small rack works well for drumsticks and for bone-in thighs, lifting the food so fat drips clear. Never use a liner that covers the bottom entirely during a high-heat cook.
Shaking is optional for thighs and mandatory for wings. A single flip at the midpoint is enough here, because the pieces are heavy enough to stay put and every flip costs heat recovery time.
Cook two small batches instead of one crowded batch; the total time is often shorter and the skin is reliably crisp.
Temperature, Resting and Carryover
An instant-read thermometer removes the guesswork. Insert the probe into the thickest part of the thigh, parallel to the bone rather than touching it, and read the lowest number you find across two or three spots. Contact with bone gives a falsely high reading because the bone conducts heat faster than the meat around it.
For dark meat, 165°F is the safety floor, not the quality target. Thighs are at their best between 170°F and 185°F, where the connective tissue has fully softened and the texture turns silky. Pulling at 172°F and resting five minutes lands the meat near 176°F, which is a comfortable place to be.
Carryover is the temperature rise that happens after the food leaves the heat. In a thigh, expect 3°F to 6°F depending on size and how tightly it is wrapped. That is why the sauce stage should start at 155°F rather than 165°F: the glazing minutes finish the cook, and the rest completes it.
Rest on a warm plate, loosely tented, not sealed in foil. A tight foil wrap traps steam and softens the skin you just spent twenty minutes crisping.
Read the thermometer away from the bone and pull the thighs just below target; the rest will finish the job.
What Actually Matters in the Appliance
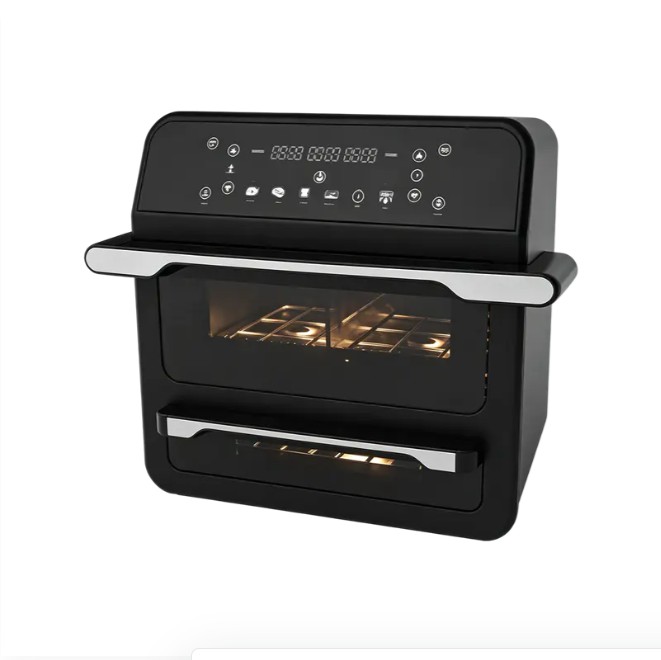
Once the method is sound, the appliance becomes the variable. Four specifications decide how well a basket handles saucy, skin-on chicken: rated wattage, usable basket volume, basket geometry and coating durability.
Wattage between 1,400 and 1,800 is the practical sweet spot for household models. Below 1,200 watts, recovery after opening the basket is slow and skin browning becomes uneven. Above 1,800 watts, the margin for error narrows and sugar-heavy glazes scorch within a minute or two.
Basket geometry matters more than the liter rating suggests. A square basket with rounded corners fits four thighs side by side without touching. A round basket of the same nominal volume often fits only three, because the corners waste space. Flat bottoms with a slight lip hold sauce better than deeply sloped ones, where glaze slides to the edges and burns against the sides.
Coating durability is the quiet long-term issue. Barbecue sauce is acidic and sticky, and repeated scrubbing of a thin nonstick layer leads to flaking within a year of regular use. A removable, dishwasher-safe basket and a separate drip tray extend the working life of the appliance considerably, and they also reduce the amount of oil that polymerizes on the heating element.
Cixi Homease Electrical Products Co., Ltd, the manufacturer behind this site, builds air fryers alongside popcorn makers, cotton candy makers, chocolate fountains, ice makers, slush machines and milkshake makers, with a 20,000 square meter production base, around 300 employees and a stated daily capacity of up to 10,000 units. That scale matters to buyers because it supports consistent output across repeat orders, and the company's custom design and new product introduction support means basket shapes, control panels and housing finishes can be adapted rather than purchased off the shelf.
Capability snapshot
- Product scope: air fryers plus popcorn, cotton candy, chocolate fountain, ice maker, slush and milkshake appliances
- Production base: 20,000 square meters with approximately 300 employees
- Stated daily capacity: up to 10,000 units
- Support: custom design, new product introduction, production management system and standardized operating procedures
- Applications served: home kitchens, parties and entertainment venues, retail channels and food service
A square basket, 1,500 to 1,800 watts and a removable coated tray will outperform a higher-wattage unit with an awkward cavity.
For Buyers: Reading an Air Fryer Spec Sheet
Anyone sourcing air fryers for a retail chain, a distributor catalogue or a food service account learns quickly that spec sheets are written for marketing rather than for comparison. The following checks narrow the field before samples arrive.
- Confirm whether the quoted capacity is nominal or usable, and ask for the internal basket dimensions in millimetres.
- Ask for the wattage at the plug, not at the heating element, and confirm the voltage variant for each destination market.
- Request the coating specification and the number of cleaning cycles it is tested for, not just the phrase "non-stick".
- Check whether the basket and drip tray are dishwasher safe, and whether spare baskets are available as service parts.
- Ask how the control panel behaves after a power interruption; mechanical dials reset, digital panels may not.
- Confirm packaging drop-test standards and the carton dimensions, since freight cost per unit often decides the landed price.
Sampling deserves its own round of testing. Cook a batch of saucy chicken thighs in the sample unit rather than running a dry heat test, because the real failure modes, smoke, pooled fat, stubborn glaze residue and uneven browning, only appear with food in the basket. A supplier that can discuss recovery time, cavity shape and coating wear in specific terms is usually a supplier that has run the same test.
Order planning also benefits from asking about production rhythm rather than a single lead time figure. A manufacturer running at meaningful daily volume can usually schedule repeat orders predictably, while a trading company reselling from stock cannot. For wholesalers balancing several SKUs, that predictability is often worth more than a small unit price difference.
Test samples with real sauce and real fat; a dry heat test hides the problems that generate returns.
Mistakes That Ruin a Good Batch
Most of these appear in the first three attempts and disappear once the cook has a thermometer and a routine.
- Skipping the preheat, which produces pale skin and a longer, drier cook.
- Applying sauce at the start, which carbonizes the sugar before the meat is done.
- Crowding the basket, which steams rather than roasts and leaves the skin flabby.
- Relying on the timer instead of a thermometer, especially with bone-in pieces where thickness varies.
- Reading temperature with the probe touching bone, which reports a number five to ten degrees too high.
- Marinating in acid overnight, which turns the surface of a thin thigh chalky.
- Wrapping in foil to rest, which traps steam and undoes the crisping.
- Leaving pooled fat in the drip tray between batches, which smokes heavily on the second round.
One more mistake is worth separating out: assuming every appliance behaves like the last one. A 1,500 watt unit with a small square basket and an 1,800 watt unit with a wide round basket will not produce the same result from the same settings, and the first cook in a new appliance should always be treated as a calibration run.
Every new appliance deserves one calibration batch before you trust its timer.
Sides That Hold Up
The basket is occupied for the whole cook, so sides should either be made ahead or cooked on the hob. Good pairings for these thighs are ones with acid or crunch, since the glaze brings sweetness and fat.
- Charred corn with lime and chili, cooked on the hob while the chicken rests.
- Cool slaw with vinegar rather than mayonnaise, which cuts through the glaze.
- Warm potato salad with mustard dressing, sturdy enough for a buffet table.
- Rice or cornbread for mopping, especially if the sauce is vinegar-forward.
- Sliced cucumber and red onion with salt, ready in five minutes.
If you want to use the appliance twice, cook the thighs first and let them rest under a loose tent while sliced peppers or thick onion rings go into the basket for four minutes. The residual fat seasons the vegetables, and the timing works out at roughly the length of a normal rest.
Choose sides with acid or crunch; the glaze already provides sweetness and richness.
Storage, Reheating and Meal Prep
Cooked thighs keep for three to four days in a sealed container in the refrigerator, and up to three months frozen. Store them with the sauce scraped off where possible, because a wet glaze turns gelatinous when cold and slumps when reheated.
Reheating in the air fryer works better than a microwave. Set 350°F for 4 to 6 minutes for bone-in pieces, or 3 to 4 minutes for boneless, and cover loosely with foil if the skin is already dark. A microwave will heat the meat through in 90 seconds but leaves the skin limp, which defeats the point of the original cook.
For meal prep, cook boneless thighs, cool them completely, slice, and store separately from rice and vegetables. Add sauce after reheating rather than before, and the texture stays closer to freshly cooked. If you plan to eat the same batch over four days, cook it plain and glaze individual portions, since repeated reheating of a sugar glaze concentrates and darkens it.
Reheat in the basket, not the microwave, and add sauce after the meat is hot.
Cooking for a Crowd or a Counter
Scaling changes the arithmetic. Six bone-in thighs fit a 6-quart basket comfortably; twelve require two batches and about fifty-five minutes of total appliance time once preheat and recovery are counted. A 10-quart unit reduces that to two faster batches, but only if the cavity remains wide enough for air to move.
For a gathering of twenty, plan on three to four batches and hold finished pieces in a 150°F oven on a rack over a tray, uncovered. Covered holding softens the skin within fifteen minutes. Sauce the held pieces only at the moment of serving, or hold them bare and glaze in a final two-minute pass.
Food service and party venues present a different constraint: predictability. Operators usually want a fixed weight per portion and a repeatable time, which is why boneless thighs are common in catering and bone-in pieces are common in casual dining. Either way, a thermometer at the pass is non-negotiable, because a tray that sits under a heat lamp continues cooking slowly.
Retail buyers think about this differently again. A rotisserie or deli counter selling cooked thighs needs equipment that recovers fast between loads, and the appliance specification that matters is often the basket's usable area rather than its headline capacity. That is the kind of detail a manufacturer familiar with both home and commercial use can address during product development rather than after launch.
For groups, hold finished pieces bare in a 150°F oven and glaze at serving, never before.
Frequently Asked Questions About Air Fryer Barbeque Chicken Thighs
How long do air fryer barbeque chicken thighs take at 400°F?
Boneless thighs take roughly 12 to 16 minutes and bone-in thighs 22 to 28 minutes, plus 4 to 6 minutes for the sauce at the end. Always confirm with a thermometer in the thickest part away from the bone rather than relying on the timer alone.
Should the thighs go in skin-side down or skin-side up first?
Skin-side down first. The skin renders against the hot basket, the fat drains away, and when you flip the piece the exposed skin crisps quickly. Starting skin-side up tends to leave a pale, soft surface.
Can I cook frozen chicken thighs this way?
Yes, but start at 350°F for 20 minutes, then raise the temperature to 400°F and continue until the center passes 175°F. Sauce goes on only in the last five minutes. Expect a total of 35 to 45 minutes and slightly looser texture than a fresh-cooked thigh.
Why did my sauce turn black?
Because it went on too early. Barbecue sauce carries sugar that scorches well below 400°F at the surface. Apply it in the final five minutes, and drop to 375°F if the sauce is especially sweet.
Do I need to preheat the air fryer?
For this recipe, yes. Three to five minutes at 400°F gives noticeably better skin and shortens the cook by two to three minutes. Models without a preheat function simply need the basket run empty.
Is 165°F enough for chicken thighs?
It is the safety minimum, but thighs eat better at 170°F to 185°F, where the connective tissue softens. Pull them at 172°F and rest five minutes for a good balance.
What should I do if the basket starts smoking?
Turn the unit off, let it cool slightly, and empty the drip tray. Pooled fat and burnt sugar on the bottom plate are the usual causes. Lining the drip tray, never the basket, reduces the problem on the next batch.
Can I make these ahead for a party?
Cook them plain to 170°F, cool quickly, and refrigerate. Reheat at 350°F for 5 to 7 minutes and glaze in the last two minutes. This keeps the skin in better condition than holding finished, sauced pieces for an hour.
Timing, skin direction and sauce placement answer most problems; the thermometer settles the rest.
Final Word
Air fryer barbeque chicken thighs reward a simple discipline: dry the skin, preheat properly, keep the pieces apart, and treat sauce as a finish rather than a marinade. Once those four habits are in place, the settings become a starting point and the thermometer becomes the referee.
For home cooks, that means a reliable weeknight plate in under half an hour with bone-in pieces and closer to twenty minutes with boneless. For buyers and product teams, it means a clear set of criteria to test against: usable basket area, honest wattage, coating durability and a cavity shape that lets air move. Appliances built with those fundamentals in mind, from manufacturers that understand both the cooking and the production side, tend to earn repeat orders rather than single-season listings.
Good thighs come from dry skin and late sauce; good air fryers come from usable space and honest specifications.
Related products
Get in Touch
Your email address will not be published.
Required fields are marked *
Required fields are marked *
contact us
Have a project in mind?
Contact with us
Contact with us
We are happy to answer your questions. Please fill out this form
and one of our professional team will get back to you as soon as possible.
and one of our professional team will get back to you as soon as possible.
-
Company AddressNO.212 Qiaotou Road, Qiaotou Town, Cixi City Zhejiang Province
-
Tel:+86-574-63032602/63032605/63032682/63032681
-
E-mail:homease@homease.com.cn
huajun_sam@homease.com.cn
jayden@homease.com.cn
sunny@homease.com.cn
Copyright © Cixi Homease Electrical Products Co., Ltd. All Rights Reserved. China Small Home Appliances Manufacturer Food Equipment Factory
